openocd深入体验(二)尝试openocd功能
本章节以H7-tool以及手头上的安富莱开发板为例,用这套组合进行连接芯片的尝试。
用经典跑马灯的例程。
具体怎么使用的细节,这里不深入,只是为了证明第一章编译出来的openocd是可以正常使用的。我们时刻铭记着我们的终极目标是为一款没见过的芯片(LCM32F039)去添加下载算法。
这里简单介绍使用方法,只是为了让读者在添加完下载算法之后,不至于不会用。
1.直接使用gdb+openocd连接芯片
gdb
有各种架构的。我们这里是为了调试STM32所以需要的是arm-none-eabi-gbd
。
在msys2
自带的软件库里面没有这个软件包(理论是gdb-mutiarch
是可以的,但是笔者尝试了用不了)
pacman -Ss gdb

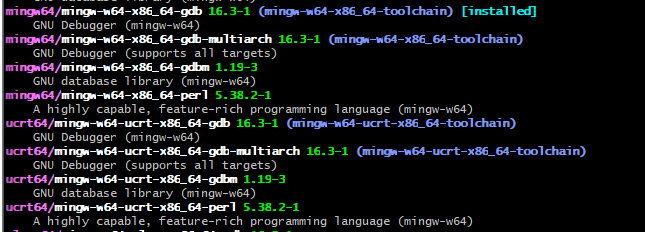
image-20250428224938616
我们要从官网下最新的交叉编译工具,选择gcc-arm-none-eabi-10.3-2021.10-win32.exe
的。
Note这里安装的时候注意最后要勾选add to path
在msys2
内也把对应路径添加到msys2MinGW64
的环境下。
echo 'export PATH="/c/Program Files (x86)/GNU Arm Embedded Toolchain/10 2021.10/bin:$PATH"' >> ~/.bashrc
source ~/.bashrc
我们打开gdb
arm-none-eabi-gdb

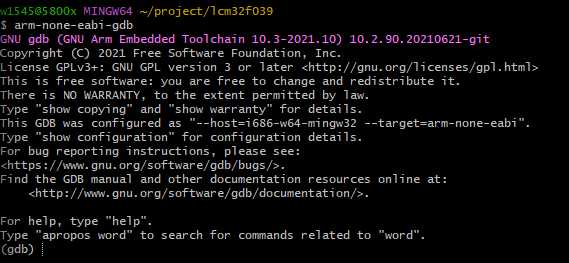
image-20250428225351917
在当前目录下放入从keil编译出来的axf文件,因为gdb调试需要axf文件。
(gdb) file output.axf
然后新建一个窗口,连上H7tool,用下面的命令连芯片
openocd -f interface/cmsis-dap.cfg -f target/stm32h7x.cfg
连上后的效果如下,openocd打开了localhost:3333端口等待gdb连接:
w1545@5800x MINGW64 ~/project/lcm32f039
$ openocd -f interface/cmsis-dap.cfg -f target/stm32h7x.cfg
Open On-Chip Debugger 0.12.0+dev-00963-g4d4c45cfd (2025-04-27-09:05)
Licensed under GNU GPL v2
For bug reports, read
http://openocd.org/doc/doxygen/bugs.html
Info : auto-selecting first available session transport "swd". To override use 'transport select <transport>'.
Info : Listening on port 6666 for tcl connections
Info : Listening on port 4444 for telnet connections
Info : Using CMSIS-DAPv2 interface with VID:PID=0xc251:0xf00a, serial=003B00313130510F33303938
Info : CMSIS-DAP: SWD supported
Info : CMSIS-DAP: Atomic commands supported
Info : CMSIS-DAP: Test domain timer supported
Info : CMSIS-DAP: FW Version = 2.0.0
Info : CMSIS-DAP: Interface Initialised (SWD)
Info : SWCLK/TCK = 1 SWDIO/TMS = 1 TDI = 0 TDO = 0 nTRST = 0 nRESET = 0
Info : CMSIS-DAP: Interface ready
Info : clock speed 1800 kHz
Info : SWD DPIDR 0x6ba02477
Info : [stm32h7x.ap2] Examination succeed
Info : [stm32h7x.cpu0] Cortex-M7 r1p1 processor detected
Warn : [stm32h7x.cpu0] Erratum 3092511: Cortex-M7 can halt in an incorrect address when breakpoint and exception occurs simultaneously
Info : [stm32h7x.cpu0] The erratum 3092511 workaround will resume after an incorrect halt
Info : [stm32h7x.cpu0] target has 8 breakpoints, 4 watchpoints
Info : [stm32h7x.cpu0] Examination succeed
Info : [stm32h7x.ap2] gdb port disabled
Info : [stm32h7x.cpu0] starting gdb server on 3333
Info : Listening on port 3333 for gdb connections
接下来在gdb的窗口里面连接3333端口
(gdb) target remote localhost:3333
用load
命令可以下载代码
(gdb) load
用continue
命令可以让程序运行
(gdb) c
然后我们就可以看到开发板的led闪烁了。
可能遇到的问题
问题1:Program received signal SIGTRAP, Trace/breakpoint trap.
Program received signal SIGTRAP, Trace/breakpoint trap.
是因为程序中调用了semihosting
相关内容,在GDB里面屏蔽即可*(这个bug就是mdk里面常见的仿真需要运行3次才会进行,同样我们这里也是这样的。因为半主机的原因)
(gdb) handle SIGTRAP nostop noprint
vscode+cortex-debug图形化调试
直接用gdb还是太原始了,有没有更加方便的方法呢?
答案当然是有的,用vscode+cortex-debug
就可以满足需求!
Warning注意这里的路径必须是英文,否则会cortex-debug会无法识别。
把跑马灯的程序复制一份,在文件夹内右键,选择通过code打开。
打开这个工程之后,插件里面安装cortex-debug。
然后在ctrl+shift+D
打开"运行与调试"界面,创建一个新的launch.json
。默认配置选cortex Debug。
关于这份json
文件每个配置的含义,可以参考官方文档
我的配置供大家参考:
{
"version": "0.2.0",
"configurations": [
{
"name": "Cortex Debug",
"executable": "C:/Workspace/V7-001/Project/MDK-ARM(uV5)/Objects/output.axf",
"request": "attach",
"type": "cortex-debug",
"runToEntryPoint": "main",
"servertype": "openocd",
"showDevDebugOutput" : "vscode",
"armToolchainPath": "C:/Program Files (x86)/GNU Arm Embedded Toolchain/10 2021.10/bin",
"configFiles": [
"interface/cmsis-dap.cfg",
"target/stm32h7x.cfg"
],
}
]
}
我们保证windows下的终端能够打开gbd和openocd
常见问题是环境变量没添加上去导致搜不到命令。
我的openocd的路径是:
C:\msys64\usr\local\bin

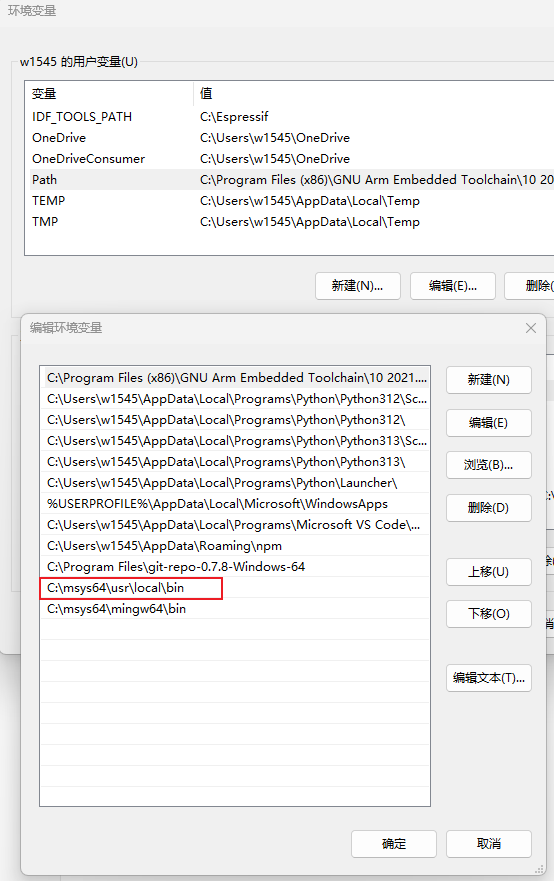
image-20250429212135125
最后按F5
启动调试,效果如下图:

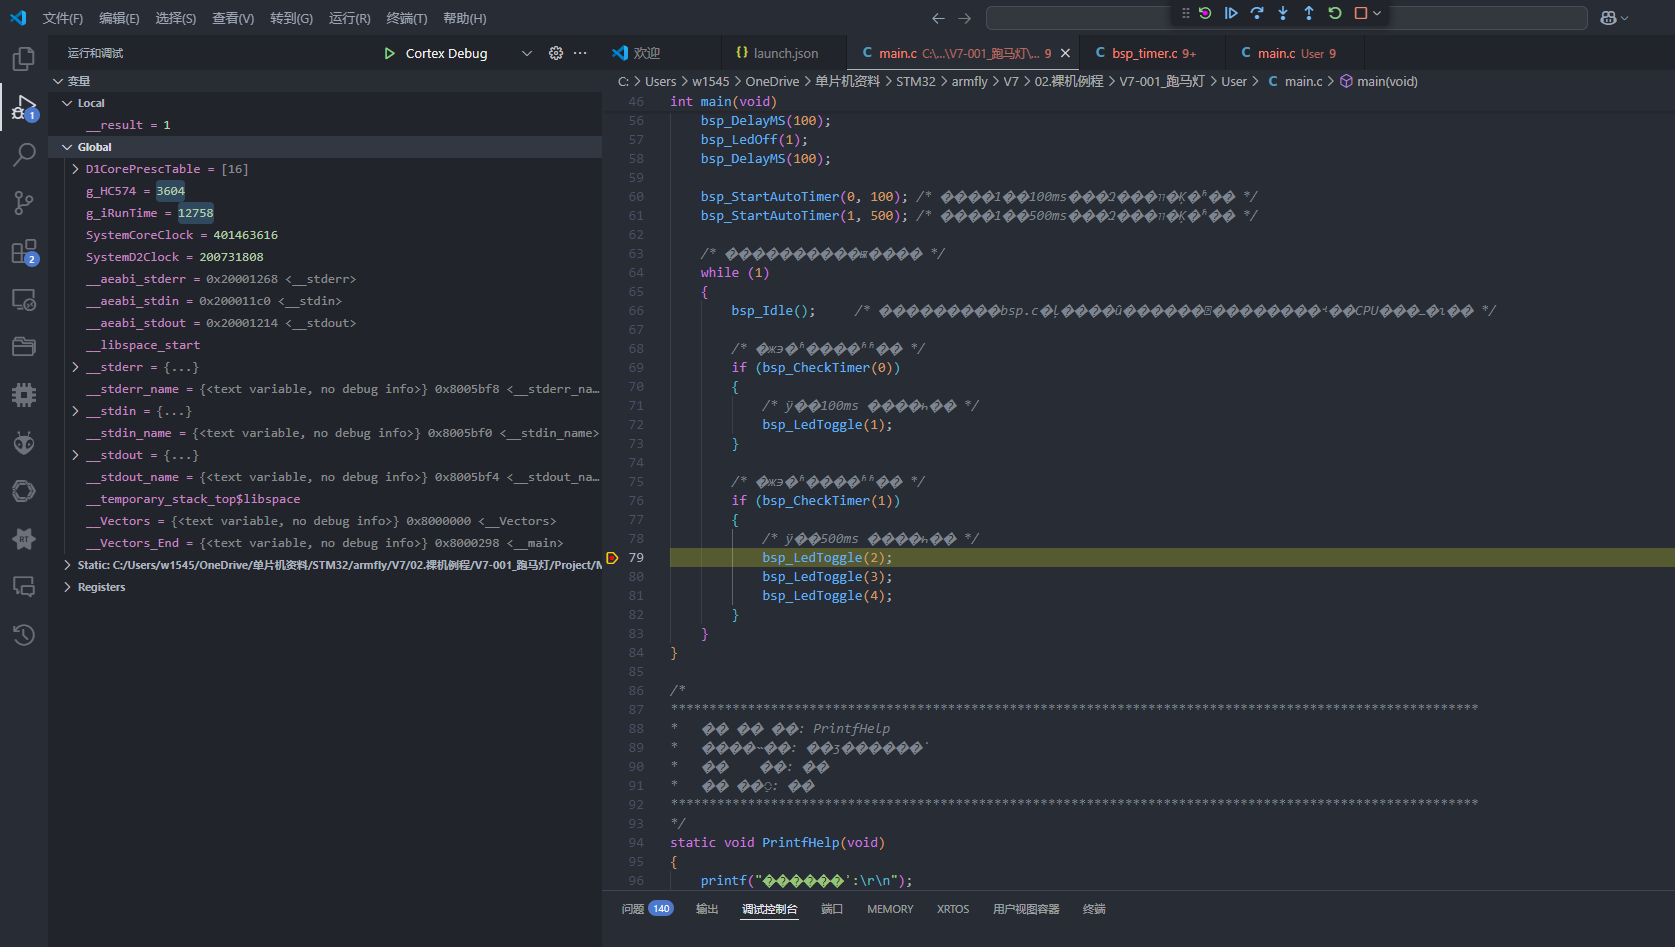
image-20250429210053089
问题1:打开openocd缺少dll文件
把dll
对应的路径也添加到windows环境变量下。例如我缺少了libhidapi-0.dll
这个文件,在msys2
中里查找它的位置:
w1545@5800x MINGW64 ~
$ where libhidapi-0.dll
C:\msys64\mingw64\bin\libhidapi-0.dll
把这个bin文件夹加入windows的PATH环境变量。
问题2:在cmd终端里面可以正常调试,但是在vscode+cortex-debug里面无法调试
这个问题我发现由于中文路径导致的,需要把路径改成英文的。